The cabinet is coming along finally, and we’re really starting to get the general idea of what it will look like when it’s done. Last time we left off with all of the cabinet shelves up, now we start on the sides and face frame. The first step is to install the small side pieces. I’ve always thought that corner cabinets look more professional when they have these little sides pieces, rather than the front just going straight across, so this was always part of the original design.

Cabinet Sides in

Cabinet Sides in
These pieces were cut at a 22.5 degree angle, to match up with the front piece, that will also be cut at 22.5 degrees.

Cabinet Sides in
Tip here, if your joints don’t line up quite right, try a 23 degree angle for the front frame. That way you get a nice joint showing in the front, even if there is a little space in the back.

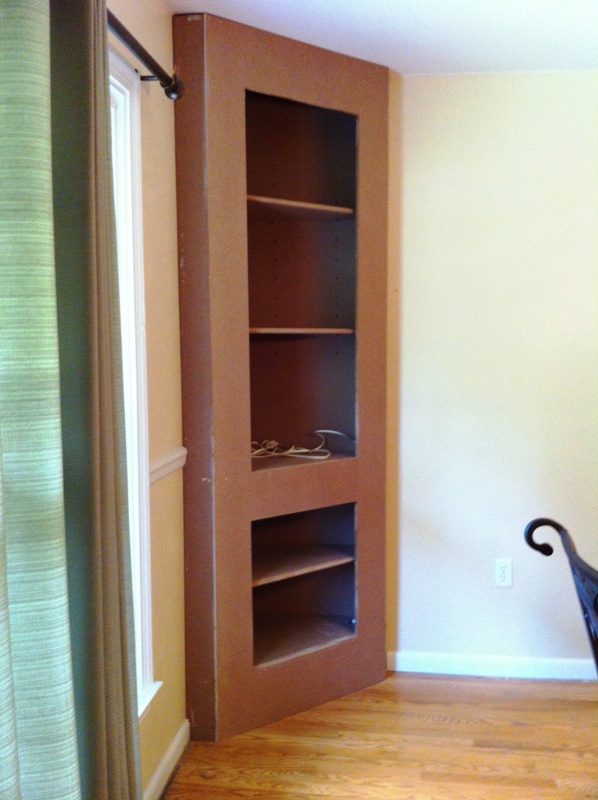
Face Frame Test Fit

Face Frame Test Fit
Here we are test fitting my front frame size. Because nothing is ever perfectly square or straight in our house, we had some creative cutting to do, but everything lined up pretty well when we were done. Once that was all established we could cut the holes in the front face frame for the cabinet on the bottom and the opening for the shelves on top.

Face Frame Cut
We had to be really careful bringing this in from the saw in the garage. The holes in the front really make it a bit fragile! We attached it with some finishing nails into the top, bottom, and middle shelves.

Face Frame

Good Size
Looks almost done now!

Relatively clean fit

Joint Close-Up
Here are a few close-ups of the joints. Not too bad. I used some liquid nails to strengthen the joint and the rest will be filled with joint compound so it’s seamless when painting.

Bottom face frame door stop

Door Stop
The bottom shelf will be used as a door stop for the inset cabinet doors, so it was positioned about 1/2″ above the bottom opening. This was we don’t need to add any door stops! Notice my up arrow too 🙂

Cabinet Opening
Next step was adding the doors. I really wasn’t sure what I was going to do here. For the test cabinet I made I used an overlay door, which was the easiest to make. An overlay door basically hides all of the edges, so nothing actually has to line up perfectly. However, I really wanted inset doors for this cabinet because they just look much nicer. So, I used the cut out piece from the front frame for my doors and it actually worked out really well!

Inset doors Test Fit
The saw thickness is almost ideal for the door spacing and obviously that piece fits perfectly in the opening. I cut that piece in half to make two doors, then hit it with the router.

Inset doors Test Fit
I routed the outside edges because the cut wasn’t pretty (ideally this would be a perfectly square edge, but that wasn’t happening here!) and then added the raised panel look with another router bit.

Inset doors Test Fit
Other than the rounded edge to the inside “panel” they look like normal raised panel cabinet doors. When painted I think they’ll look even better.

Inset doors Test Fit
I wouldn’t use solid MDF doors for kitchen cabinets that you’ll be using every day because the corners dent relatively easily, but most likely we’ll rarely be opening this cabinet. We’ll probably store some nice china and table cloths in there, so no problem using a somewhat fragile door here.

Top light testing
And remember that light we put in last time? Looks great right!
Now that the cabinet construction is completed we can start on all the molding work. We plan to add some nice large baseboards and upgrade the “starter trim” around both doors.
Leave a Reply